Paper piecing is often daunting because your working on the reverse of the paper pattern.... Recently I sat down and played with paper piecing until I got it and understood it.... Yes I messed up a lot and had to restart several times but I learned each time I messed up.... So I thought I could pay it forward and help a neighbor out by helping to ease those fears of wasting fabric which is a quilters sin and learn to paper piece with confidence!! So let me just explain the pattern a bit, think of this as a puzzle that your piecing, it's numbered so on this pattern I'm over lapping on piece #2 by a 1/4 inch and if you'll look at the photo I've laid my fabric out on the backside of the pattern, holding it up to the light helps you determine fabric placement, also while your checking fabric placement make sure the fabric completely covers the pattern outline your working on.... You can also complete this step on the front side to ensure the fabric piece is big enough.

In this pic you'll see the backside of the pattern,
the fabric goes on the revers with right sides together for step 1 & 2( the wrong side or backside of your fabric faces the paper), your going to completely cover step #1 with the fabric with 1/4 laying over step #2 and sew on the right side or printed side of the pattern as seen below on the pattern line. For this step you'll sew on the line that connects step 1 and 2. Make sure you iron your fabric open after each step to ensure its placement.
Follow the line, you also may want to shorten your stitch length to aid in removing the paper pattern later. The shorter the stitch the less fight you'll have, you can also use paper specifically made for paper piecing found online or in your local quilt store.
Below I've started step 3... In this photo your looking at the right side with the fabric being on the backside.
In his photo I'm placing step 3 in place with right sides together I'm overlapping 1/4 onto step 3 because your working in the reverse ok in the photo above you can see steps 1 & 2 ironed open. I purposely didn't trim steps 1 & 2 because I wanted you to see them open and step 3 positioned with right sides facing each other, ( I went back and trimmed so I could make sure my 1/4 seem allowance was there) your going to sew on the line between step 2 and 3, turn over the pattern open the fabric and iron. Step 3 completed now on to the rest!!
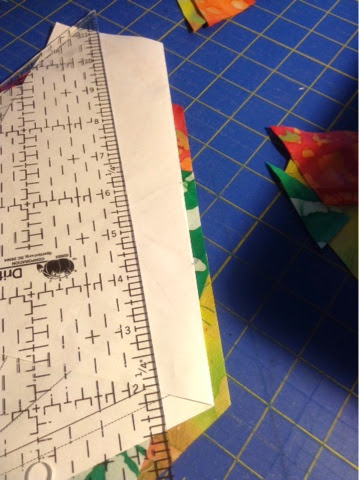
This picture simply shows you how I trim the excess fabric.... I fold my pattern at the line for my next step.... I have steps 1 thru 4 completed and before moving on I need to trim.
Using a ruler with a 1/4 line marker I lined up the ruler overlapping the pattern by 1/4 in and trim the excess fabric off, fold your paper pattern back out, now you have a nice straight line to add the next step to.
See the excess is cut and this is the 1/4 seem allowance for that next step, I'll use this 1/4 seem allowance to line up my fabric for the next step.
So following the pattern and moving right along this is steps 1 thru 8, as I finish each step I open them and iron them into place ensuring the next step is ready and flat.
Once I have completed all the steps as indicated by the pattern I lay my pattern right side up and trim around the pattern 1/4 in. then turn it over and start pulling the paper off, you can pull slightly on opposite corners of the fabric and pattern and the paper will tear slightly then it should just come right off with you pulling on each piece because you've shortened your stitch length early on.
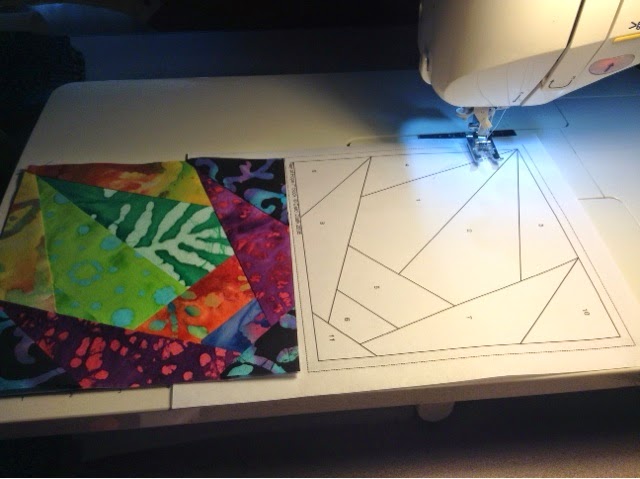
Once it's trimmed and the paper is pulled off you can iron again. I layed the pattern out next to the block so that you can see the whole piece side by side..... I hope this helps and that your next project includes paper piecing!!
This is Betty my vintage 301A that I've been using to do my paper piecing with. She reminds me of Betty Rubble, always there to lend a hand, and she's a wonderful machine!!