haha its how I feel some days!!

haha its how I feel some days!!

Friday, November 7, 2014

Lots of Love still left in these old Pews!

Church pews are beautiful and are full of history both happy and sad. These benches have seen new life, couples recite their vows, friends, families and reletives paying respect to the dearly departed.... They have been loved by many church families over several decades. These beauties have seen better days it's true, but.....
Just because something has seen better days doesn't mean it's life is over..... Sometimes that sad dilapidated and old piece of furniture needs a simple face lift!! 
In the beginning these benches had no padding or fabric covers, they were bare.... Some other soul saw their need for revitalization and gave them new life with new padding and padding covers, but soon decades passed and those pews needed updating again.

So they were given away to some lucky soul who saw past their flaws to the possibilities that could be....... so they were cut in half....
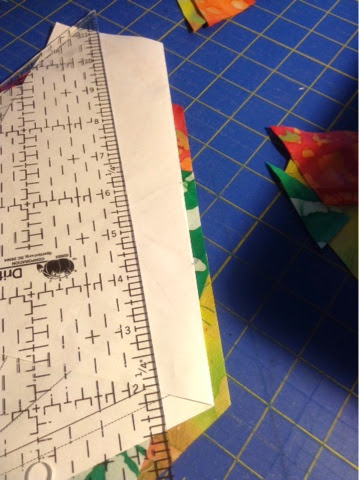
New ends were traced out, glued together, cut out....
Sanded and stacked into a pile for later match ups...
Then they were sanded between each coat of paint.
Some were painted in serene colors...
Others were customized with hand painted details.
Some needed custom stencils made to replicate business logos...
Taken from business cards....
Painted in custom colors of light purple and green....
Designed into a stencil. Then painstakingly applied and painted. This pew is now a bench at a local daycare čenter, not only is it comfortable but it doubles as advertising for the daycare center logo!!!
Now this Pew is pretty with Custom Made Pillow Case Covers by Harts Custom Sewn Creations!
Or painted in Collegiate colors for those die hard fans!
Now there's more history left to be had on the seat of this old seen better days Church Pew! Let the front porch sharing, football watching, sweet tea drinking, old couple of love birds add to this old pews story!!


Sunday, November 2, 2014

My first really Big Commissioned project!!


I've been sewing on and off for about 17 years, 8 years ago we bought this house and my project area grew, I now have a room dedicated just for sewing!! Yes, it has a futon and a TV in the room, the futon is so my hubby can sit and watch tv, while I sew. I enjoy having my hubby share my space while I'm creating! 
This new customer is a local daycare center to a worldwide supplemental insurance company here in town. The daycare center needs 137 curtains!! Thàts just a little overwhelming, but I can do it!! 

This is just a few of the spools of thread to help complete this project!! Love those colors!! 


Sunday, October 26, 2014

MODA batiks are my must haves!!

I have a new quilter friend in Italy, she sent me this beautiful pattern that she created and told me to have fun with it.... 

I instantly knew I had a MODA charm pack in batiks hiding in my stash that I was going to use in this but I needed more... 

So I looked on eBay and found a beautiful MODA jelly roll and purchased it without a second thought! This quilt I'm calling "Basket Case" is truly stunning, I can't wait to get to the fun part of free motion quilting on this beauty!! Look for the progress on "Basket Case" here!!!

Friday, July 11, 2014

Homemade Whole Wheat Bread crumbs


Homemade bread crumbs are both healthy and great tasting! I make my own bread crumbs because I can't find them in the grocery store, not that I'll ever buy pre-packaged bread crumbs again. I know that with homemade I control the salt and excessive ingredients. Plus have I told you how good these bread crumbs are?? They're great!! 

Whole Wheat Bread Crumbs

12 slices WW bread (I used natures best 100% whole wheat) toasted in a toaster or in the oven, set the oven to broil and watch closely, don't walk away.... I know!!
2 tbsp Italian seasoning
2 tbsp dried Parsley
1 tbsp garlic powder
1 tsp black pepper
1/2 tsp salt, I used light salt, it's 50% less sodium than table salt.
1 package Goya Sazon-  you can find this in the Ethnic aisle at the grocery store or WM.... 

Take the toast and pulse it in the food processor until it's course, I don't want fine bread crumbs, if you prefer them to be fine, pulse them for longer until the consistency is what you want.
Add the rest of the ingredients and mix until well blended, I pulsed the ingredients in with my crumbs.
The end result smells amazing and are great to use in place of regular store bought breadcrumbs.

Zucchini Fries


I used 5 medium sized fresh zucchini, washed and the ends cut off, then quartered. 
Fresh homemade breadcrumbs made with 12 slices whole wheat bread toasted and run through the food processor into course bread crumbs, you can mix the bread longer if you want fine bread crumbs. 2tbs Italian seasoning, 1tbsp garlic powder, 1/2tsp salt, 1tsp pepper, 1 package Goya Sazon found in the Mexican food isle at the grocery store or WM. Mix all ingredients in the blender well. 
Coat zucchini in 5 scrambled eggs, then coat well in breadcrumb mixture. Shake off excess.
Spray a sheet pan with canola oil spray, lay the wedges out so that they're not touching. Pre-heat oven to 350, cook zucchini for 45 to 55 minutes. 
The zucchini will come out golden brown and crunchy, but the center is a creamy goodness you can't imagine!! 
Try it the next time your having burgers,you and your family won't be disappointed!!


Thursday, July 10, 2014

Easy and Delicious microwave Corn on the Cobb!!


Fresh from the grocery store corn on the cobb, uncut. No soaking is needed, this is a great last minute, no mess veggie fix.


Trim up your fresh corn on the cobb by using kitchen shears to cut some of the stalk and some of the excess leaves away.
Like you see in this photo above, don't remove too much, you still want the corn to be encased in the husk.
Microwave on high for 4 minutes, the corn will steam in its husk.
Cut the end of the corn and stalk away, don't cut the silk end.  You want to feel for the end of the cobb and make sure you cut straight so the husk comes off, if you don't cut enough of the end off, squeezing the corn out isn't as easy. 
Use a clean dish towell to hold the cobb and slowly squeeze the corn on the cobb out of the husk, the corn is very hot so handle with care. Ask me how I know this!! 
As you can see the husk just slips off without the silk strands and the mess is contained!! No mess all over the kitchen!! !  I wanted to try this way of cooking corn and today it was a lifesaver because I'd forgotten to boil the water!!! Who forgets to boil the water?? This girl!! 
As you can see the silk is no were to be seen, what your left with is clean, fresh, piping hot and juicy corn on the cobb!!  I'd say this Pinterest post was a PASS!! 

Monday, July 7, 2014

More Paper Piecing

 
This paper pieced pattern was from www.quilterscache.com it's called the state of Connecticut star block. It's a star sampler block that I'm making up as I go along.... Some are measured and cut and some are tried and true old patterns and the rest are paper pieced!! This one happens to be my current fav!! 

Monday, June 23, 2014

Paper Piecing Tutorial

Paper piecing is often daunting because your working on the reverse of the paper pattern.... Recently I sat down and played with paper piecing until I got it and understood it.... Yes I messed up a lot and had to restart several times but I learned each time I messed up.... So I thought I could pay it forward and help a neighbor out by helping to ease those fears of wasting fabric which is a quilters sin and learn to paper piece with confidence!! So let me just explain the pattern a bit, think of this as a puzzle that your piecing, it's numbered so on this pattern I'm over lapping on piece #2 by a 1/4 inch and if you'll look at the photo I've laid my fabric out on the backside of the pattern, holding it up to the light helps you determine fabric placement, also while your checking fabric placement make sure the fabric completely covers the pattern outline your working on.... You can also complete this step on the front side to ensure the fabric piece is big enough. 
In this pic you'll see the backside of the pattern, the fabric goes on the revers with right sides together for step 1 & 2( the wrong side or backside of your fabric faces the paper), your going to completely cover step #1 with the fabric with 1/4 laying over step #2 and sew on the right side or printed side of the pattern as seen below on the pattern line. For this step you'll sew on the line that connects step 1 and 2. Make sure you iron your fabric open after each step to ensure its placement.
Follow the line, you also may want to shorten your stitch length to aid in removing the paper pattern later. The shorter the stitch the less fight you'll have, you can also use paper specifically made for paper piecing found online or in your local quilt store. 

Below I've started step 3... In this photo your looking at the right side with the fabric being on the backside. 
In his photo I'm placing step 3 in place with right sides together I'm overlapping 1/4 onto step 3 because your working in the reverse ok in the photo above you can see steps 1 & 2 ironed open.  I purposely didn't trim steps 1 & 2 because I wanted you to see them open and step 3 positioned with right sides facing each other, ( I went back and trimmed so I could make sure my 1/4 seem allowance was there) your going to sew on the line between step 2 and 3, turn over the pattern open the fabric and iron. Step 3 completed now on to the rest!! 
This picture simply shows you how I trim the excess fabric.... I fold my pattern at the line for my next step.... I have steps 1 thru 4 completed and before moving on I need to trim.
Using a ruler with a 1/4 line marker I lined up the ruler overlapping the pattern by 1/4 in and trim the excess fabric off, fold your paper pattern back out, now you have a nice straight line to add the next step to. 
See the excess is cut and this is the 1/4 seem allowance for that next step, I'll use this 1/4 seem allowance to line up my fabric for the next step.


So following the pattern and moving right along this is steps 1 thru 8, as I finish each step I open them and iron them into place ensuring the next step is ready and flat.
Once I have completed all the steps as indicated by the pattern I lay my pattern right side up and trim around the pattern 1/4 in. then turn it over and start pulling the paper off, you can pull slightly on opposite corners of the fabric and pattern and the paper will tear slightly then it should just come right off with you pulling on each piece because you've shortened your stitch length early on.
Once it's trimmed and the paper is pulled off you can iron again. I layed the pattern out next to the block so that you can see the whole piece side by side..... I hope this helps and that your next project includes paper piecing!! 


This is Betty my vintage 301A that I've been using to do my paper piecing with. She reminds me of Betty Rubble, always there to lend a hand, and she's a wonderful machine!!

Sunday, June 22, 2014

Cathedral Window Pillow Covers

I found a cathedral window pillow cover tutorial on Pinterest that I loved and because the covers look fantastic, I decided I had to make it.  After I finished the first one in such a short period of time I decided they would look even better as throw pillows on our bed so I then decided I just had to make a few more!!! So here's my spin on the cathedral window pillow covers!! I plan on making a larger one for the center of the throw pillow pile but I first have to finish a customer quilt!!

Wednesday, June 18, 2014

Turkey Burgers on whole wheat buns:)

Turkey Burgers, Yum!! 

Turkey burgers with homemade bread crumbs

Homemade whole wheat bread crumbs
I know not everyone wants a turkey burger on a bun with lettuce and tomato, but I do!! I love these things, I also use this same recipe to make turkey meat loaf, which is also a big hit around here. I make my own whole wheat bread crumbs and use the crumbs in recipes that call for bread crumbs. They're full of flavor and smell amazing not to mention a lot healthier!!!

Turkey Burger recipe-

Whole wheat buns

1.5 lbs ground lean turkey
1 c homemade bread crumbs ( recipe below)
2 large eggs
1/2 medium onion diced
1/2 tsp salt
1/4 tsp pepper
1/2 tsp finely chopped garlic
1 tbsp olive oil for cooking

Mix all ingredients well, shape into burgers and cook in a large skillet for 7 to 8 minutes per side in 1 tbsp of olive oil
Remove from pan and sit on a paper towel lined plate to collect the excess oil. Warm buns or toast your preference. I know not everyone likes onions so you can omit them if you wish, some also
prefer their onions on top the burger, again you can alter this recipe to fit your taste buds!! Serve hot with or with out cheese atop a whole wheat bun with sliced tomatoes and leafy lettuce, a little mayo, mustard or steak sauce.... It's sooo good!!


Whole Wheat Bread Crumbs

12 slices 100% whole wheat sliced bread- toasted really good
1/2 tsp garlic powder-I've also used pre-minced garlic from the grocery store.
1/2 tsp black pepper
1 tbsp dried parsley
1/2 tsp onion powder
1/2 tsp Italian seasoning

I used a food processor to finely chop the toasted bread, once all the bread is in the processor and ground to your liking add the rest of the dry ingredients and pulse until well blended. These can be frozen in a sealable bag or bowl for later use. If you don't have a processor that's ok just place bread in a large zip lock bag and use a large glass or rolling pin to crush the bread into bread crumbs, then add the rest of  the ingredients and mix well.

Thursday, June 5, 2014

Another Vintage Singer Sewing Machine

I added this vintage Singer 327K in December of 2013.... I found her in ATL in almost mint condition, I say almost because her case looks a bit worn, but she's a beauty and is a true workhorse!! She'll sew through anything and makes no fuss about it, she's quiet and trustworthy.... Everything a quilter wants and needs in an all metal sewing machine, and that color!! Swoon Worthy!!